Perhaps if you’ve never used Mailchimp before, it can seem a little daunting to know where to start. No need to worry, though, as I’ve put together this accessible guide on how to use Mailchimp to help get you off the ground and running.
I’ve put together this tutorial on Mailchimp that aims to get you from zero to hero in ten easy steps. Starting off with the dashboard, I’ll talk you through all the steps from creating your first email list, to setting up a sign-up form, and then creating your first email template.

After you’ve gone through these steps, I’ll also show you how to set up a campaign, preview a campaign, use filters, and report the progress of your campaign.
Finally, I know that many of you will be looking to use Mailchimp as part of your freelance sole trader operations, or maybe you run a microbusiness, so I’ve added some extra features at the end of this guide that could suit your needs.
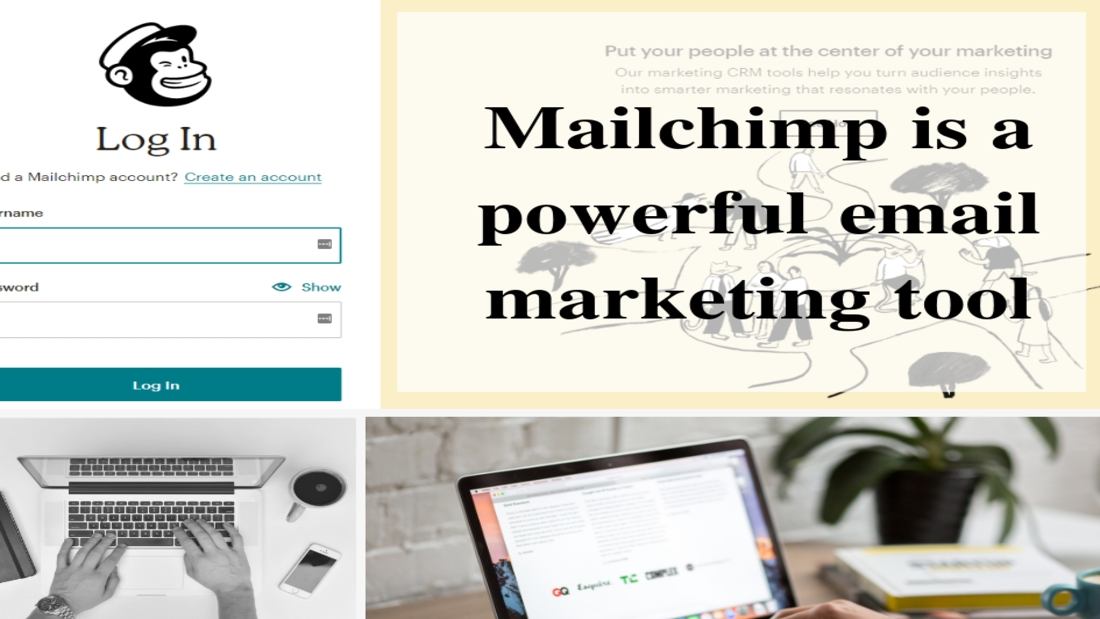
Mailchimp is a powerful email marketing tool that is useful for all business sizes but is most commonly used by companies with between 10 and 50 employees. If you’re running a smaller operation, it will certainly save you valuable time once you get to grips with it.
If you’ve been asking “ what is Mailchimp and how can it help my business?”, I’ve included in the final two sections about using it with WordPress and other integrations in this ultimate Mailchimp guide for 2024.
10 Steps to Mailchimp Success — Your Ultimate Guide 2024
Table of Contents
1. Getting started with MailChimp
2. Create your first email list
Click on the ‘Lists’ Tab.
Complete all the List Details
Go through to the LIST dashboard
Verify your sending domain
3. Setting up a signup form
4. Create your first email template
5. Setting up a campaign
6. Preview and Send your campaign
7. Using filters
8. Reporting the progress of your campaign (including A/B testing)
9. Mailchimp and WordPress
10. Power up your Mailchimp experience with integrations
1. Getting started with Mailchimp — know your dashboard
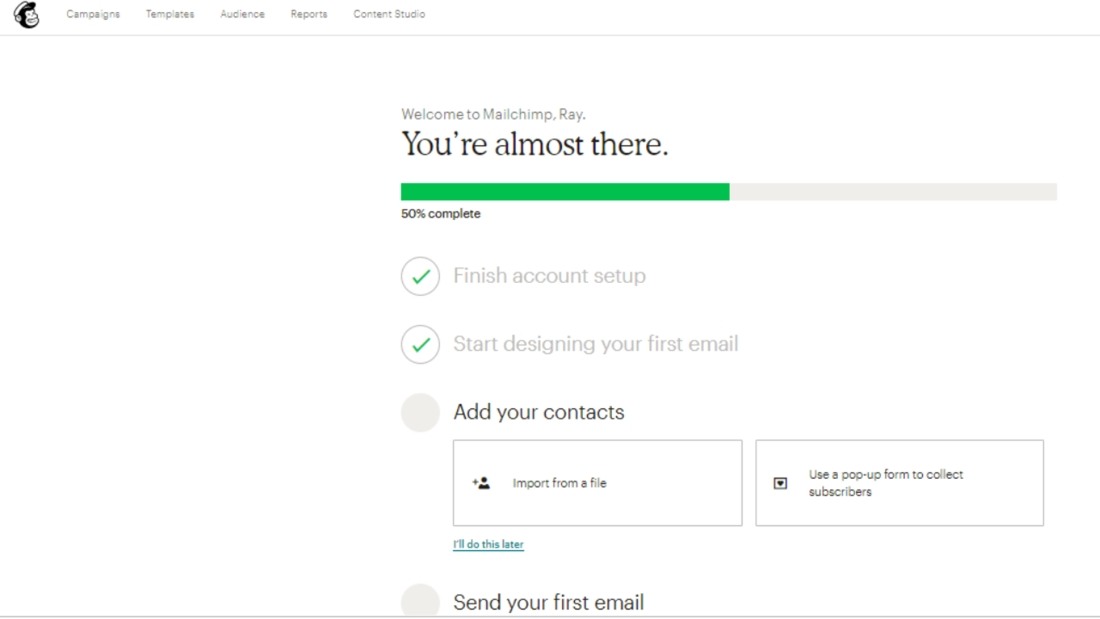
The first thing you need to do is register for an account and log in if you haven’t done so previously. Once you’ve logged into your account, you’re taken to the dashboard screen by default:
Take a good look around, and familiarize yourself with what’s on display. You can see that at the top of the screen there are four tabs, and here’s what they do:
Campaigns
Mailchimp is an email marketing tool that is based on ‘campaigns’. Basically, these are all the emails, landing pages, and other links you will send out to your customers. I’ll talk about how to set up your campaigns in step 5 of this guide on how to use Mailchimp.
Templates
The next tab is the templates tab, where you can design all the emails or other content for your marketing campaigns. I’ll talk about this further in Step 4.
Lists
The next tab is the place you can manage all your email lists. It is likely that some lists will overlap, so this is a useful feature. Setting up a list is one of the first things you’ll want to do, and I’ll explain how you can do it in the next step of this guide.
Reports
One of the most powerful features of Mailchimp is being able to monitor and analyze the progress of your campaigns. All the reports you can access are obtained by clicking this tab. I’ll discuss reporting in more detail in Step 8.
[click_to_tweet tweet=”One of the most powerful features of Mailchimp is being able to monitor and analyze the progress of your campaigns.” quote=”One of the most powerful features of Mailchimp is being able to monitor and analyze the progress of your campaigns.”]In time, once you start using Mailchimp and all its features, you’ll also notice some other useful information on the dashboard page, but no need to worry about that just yet.
First of all, you’ll need to set up some lists, signup forms, and an email template to get you going. So, are you ready to give it a try?
2. Create your first email list
The first thing you’ll probably need to do when using Mailchimp is to set up an email list, so this is why it comes in at Step 2 of this guide.
[click_to_tweet tweet=”The first thing you need to do when using Mailchimp is to set up an email list.” quote=”The first thing you need to do when using Mailchimp is to set up an email list.”]You may want to keep things simple and start off with just one list, but you can create as many lists as you like. This could prove to be a crucial part of your overall marketing campaign — so think carefully about who needs to be included in your various lists.
Before you even think about what content you’re going to be sending your contacts, or how you’re going to target them, you need to make sure you’re targeting the right people.
Make sure all your contacts are up-to-date and relevant so that at each stage of your campaign, you’re targeting the right people.
One thing to note is that if you copy the same contact from one list to another, it will count separately towards your overall subscriber limit. So you may want to think carefully about how often a contact appears across your lists – because you pay Mailchimp based on the number of subscribers.
You can also segment a larger list into smaller portions, group your contacts, and add tags to make managing your lists even more streamlined.
It is a good idea to only create separate lists for completely different campaigns, otherwise, you’ll end up paying twice for the same subscriber. So, keep your lists streamlined and it will be an advantage to your costs.
If you’re ready for it now, here’s how you can go about setting up your first list.
1: Click on the ‘Lists’ Tab
From the Dashboard, go straight to clicking on the Lists tab. This will take you directly to the next step, which is creating the list.
2: Complete all the List Details

The first box you’ll see requires you to enter a name for your list. Note that this is a public name which will appear on all your Mailchimp pages, so be sure to choose a suitable name.
Ideally, you should aim to call this list the name of your business or website.
The next two boxes are also crucial to get right. It asks you to enter your ‘default from email address’ and ‘default from name’. These will be seen by your contacts after sending them an email, so make sure that it is an email address that you have regular access to.
You should also provide an actual person’s name (perhaps your name?) to the default from name, rather than just the business name, as most customers want to know who they’re dealing with.
The next box will be a default message sent to every subscriber to your list, so choose a suitable message to remind them how they signed up to your list.
Finally, you’ll need to list the physical address of your company or organization to adhere to international anti-spam laws.
3: Go through to the LIST dashboard
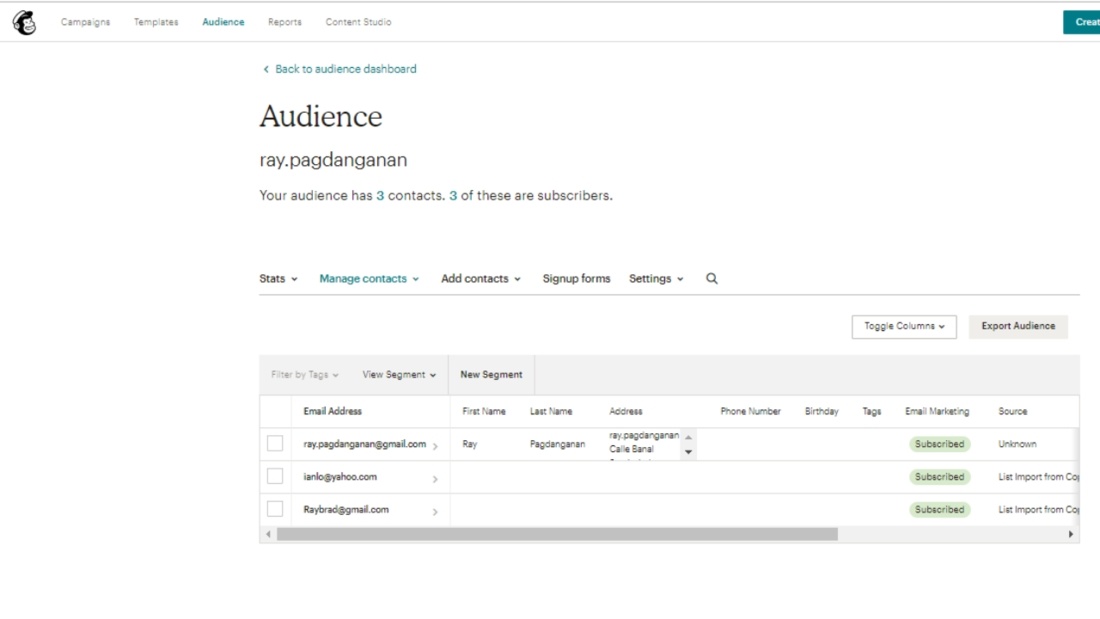
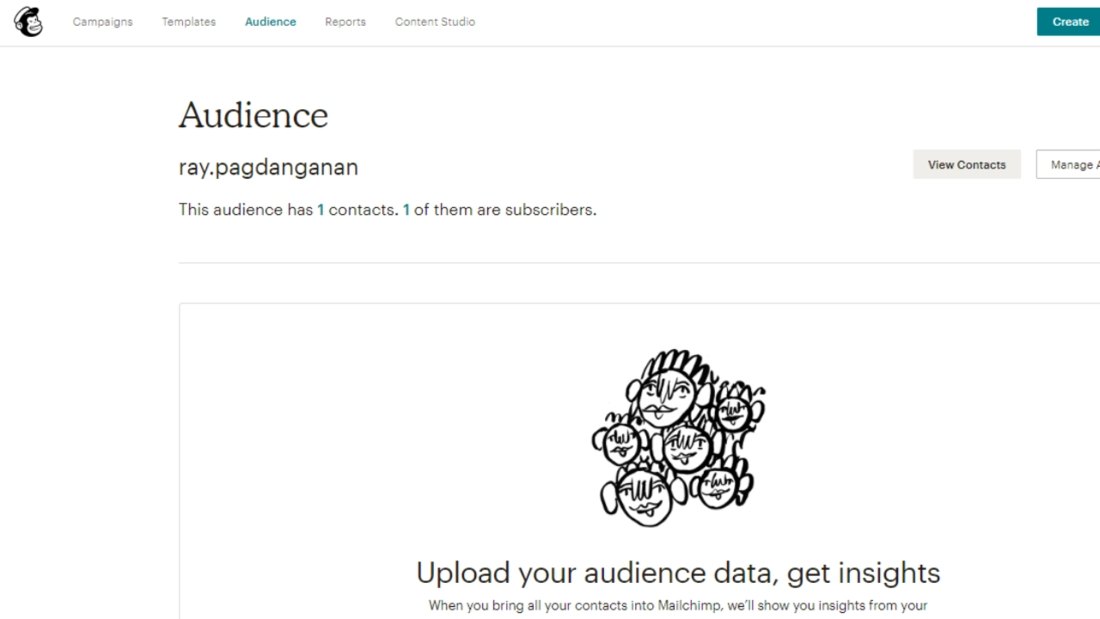
Once you’ve set up your first list, you’ll automatically be taken to another dashboard — specifically for your contact lists. Familiarise yourself with some of the features on this page.
Notice that on this dashboard, you have 5 tabs — Stats, Manage Subscribers, Add Subscribers, Signup forms, and Settings.
At this stage, it will state that you have no subscribers — you’re going to add them later.
You can also manage your Signup forms by clicking on the tab, and I’m going to go into this at the next step of this ultimate guide.
Before the next steps, you need to finalize the process of setting up your first list.
4: Verify your sending domain
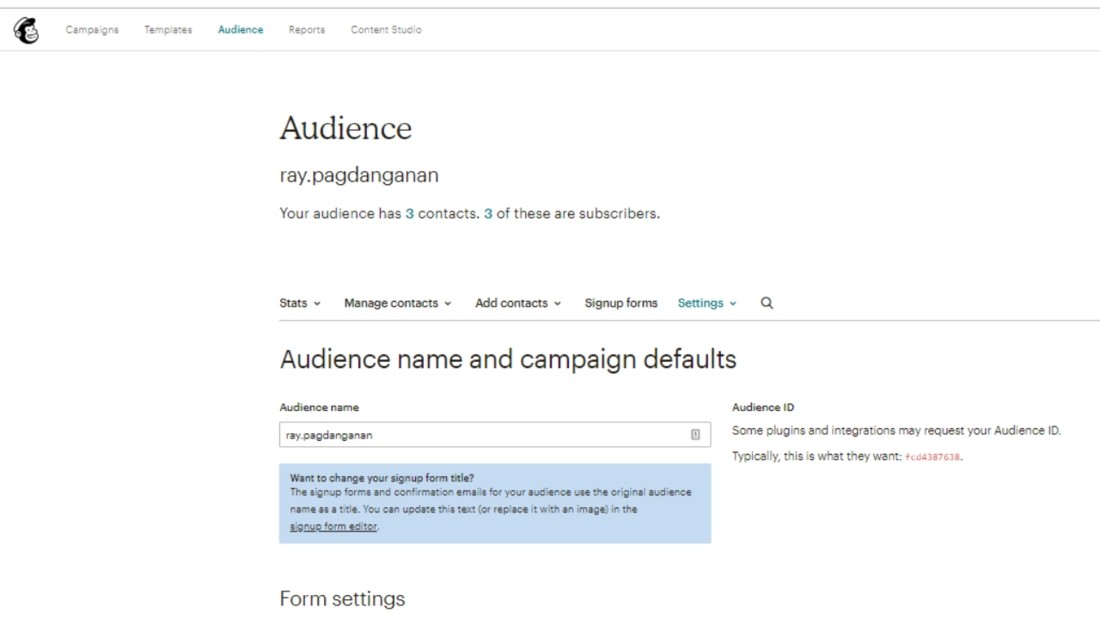
MailChimp won’t allow you to set up a signup form unless you confirm your sending domain, so you’ll need to do this before the next step.
Click on the ‘settings’ tab on the dashboard. Then, click on the first item — List name and defaults. Here, you’ll see some of the information you already put in — the List Name, the default From name, and the default From email address.
[click_to_tweet tweet=”MailChimp won’t allow you to set up a signup form unless you confirm your sending domain.” quote=”MailChimp won’t allow you to set up a signup form unless you confirm your sending domain.”]Below this, click on ‘verify domain’ and a window will pop up, asking you to confirm the email address you want the verification sent to. If you’re certain the address is correct, click the button to send the verification email.
Open up the email once it’s been sent, and either click the button that says ‘verify email address’, or copy the verification code at the bottom.
If you’ve copied the code, you can go back to Mailchimp and paste it into the box on the popup window that appears when you click ‘verify domain’. This should bring up a message that says ‘Domain successfully verified’.
Now you’re ready to continue and set up a signup form.
3. Setting up a signup form
A signup form is going to be a crucial part of your ongoing email marketing campaigns and will help you build lists over time. It is a tool that allows people to add their emails to your list.
There are various options for how to use a signup form, including third-party integrations or using it with WordPress, and I’m going to talk about these in steps 9 and 10 of this guide. But for now, let’s go ahead and create a basic signup form right from Mailchimp.
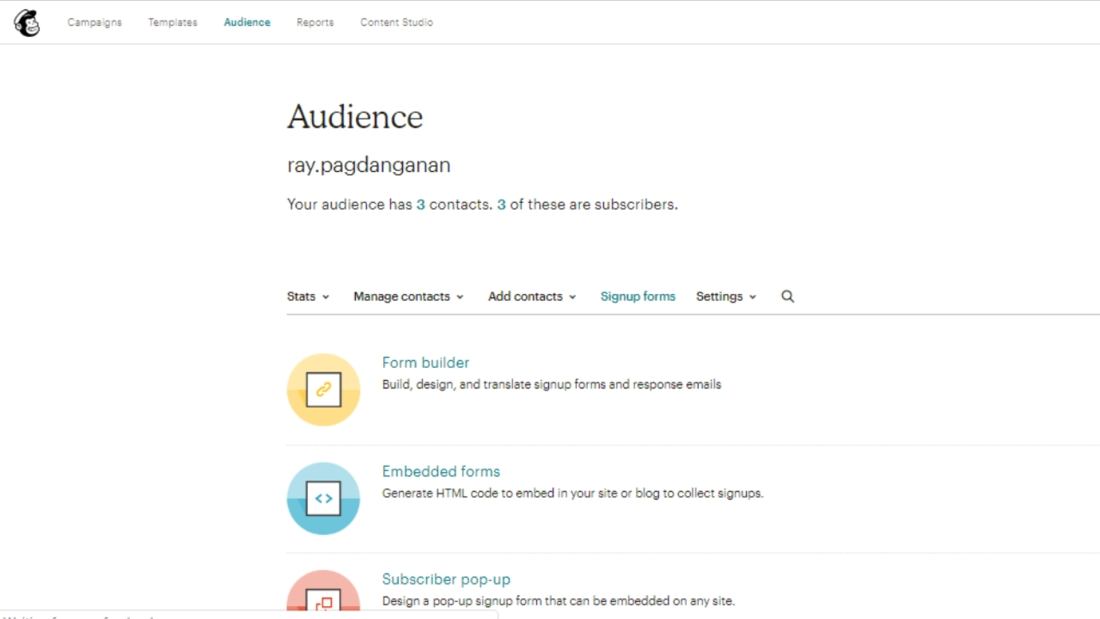
So, make sure you’re in the Lists dashboard, and then click on the ‘Signup Forms’ tab. Here, you’ll see a list of options, but for now, let’s click on the first choice, which is ‘General Forms’.
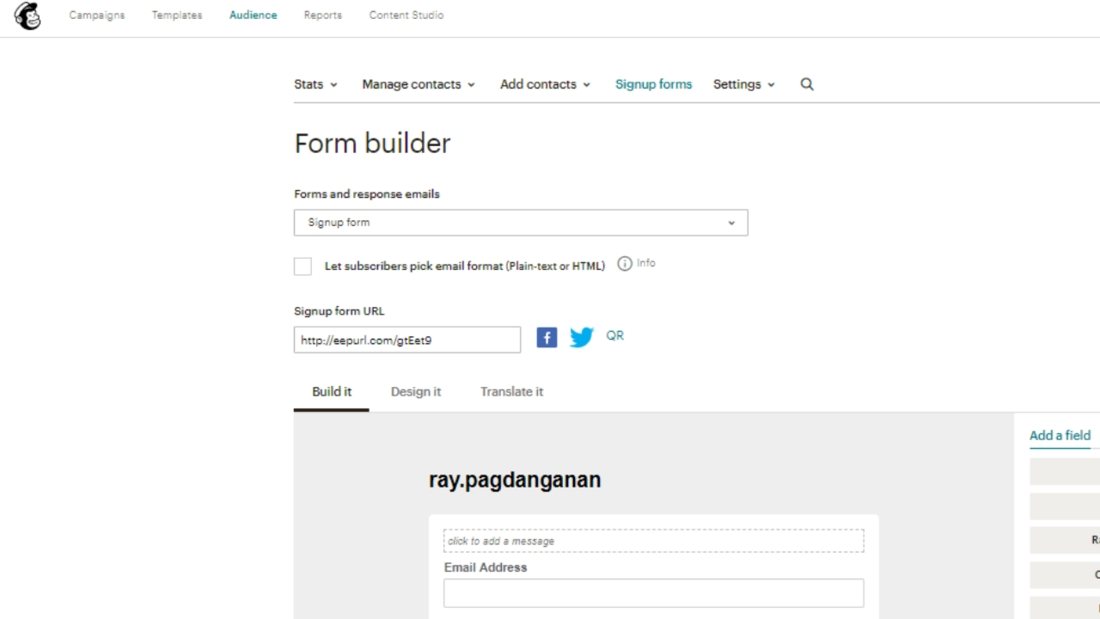
You’ll be taken to the Mailchimp drag and drop form builder. Naturally, you’ll need fields such as Email Address and Name, and you can add a tag under the ‘field settings’ on the right. You can also hide a field or delete it entirely.
Make sure to include relevant information on your signup form, such as an explanation of what the signup form is for (i.e. why they might want to join your list), and you can also add an image, such as a banner.
You can drag and drop the order of the fields, but you probably want the text explanation to come before the request for their email address and other contact details.
You can also request as much information about the subscriber as you like, including details such as an address, phone number, date of birth or other personal details. However, my advice is to keep the initial signup form as basic as possible.
You’ll want to keep things simple to encourage as many people as possible to use your signup form until the point when you’ve built up a decent contact list for your email campaigns.
Something that looks too complicated or takes too long to fill out may put people off, so keep the form basic, to begin with, to encourage people to sign up.
After a substantial amount of people have joined your list, you can start making the signup form more specialized, by requesting more specific information.
There are a couple of other tabs, next to ‘Build It’ (the one you’ve been working in) at the top. ‘Design it’ allows you to change the background and text colors, fonts and a few other aspects that help you fine tune the look for the form.
[click_to_tweet tweet=”The ‘Translate it’ tab is useful for targeting speakers of other languages.” quote=”The ‘Translate it’ tab is useful for targeting speakers of other languages.”]. You can set your default language, text direction, and change some of the fields.Once you have gone through all three tabs and you’ve accomplished setting up your first signup form, you can view and copy the Signup Form URL. This URL will direct users to your Mailchimp Signup Form, and new contacts will automatically be added to your list.
You’ve now achieved two fundamental features of Mailchimp — setting up your first list and setting up your signup form. You’ll see how the second feature feeds into the first. With your signup form all set up, you’ll be able to build your lists in no time.
Now you’re ready for the next step, which is to create your first email template.
4. Create your first email template
As you’re going to be using Mailchimp to send out multiple emails to large crowds of people, you’ll find that this feature will save you bags of time in the long run.
You can tailor each email to be specific to each contact you’re sending it to, but before that, you’ll want to have a good bare-bones email in place. Once you have a solid skeleton, you can tweak and build upon it.
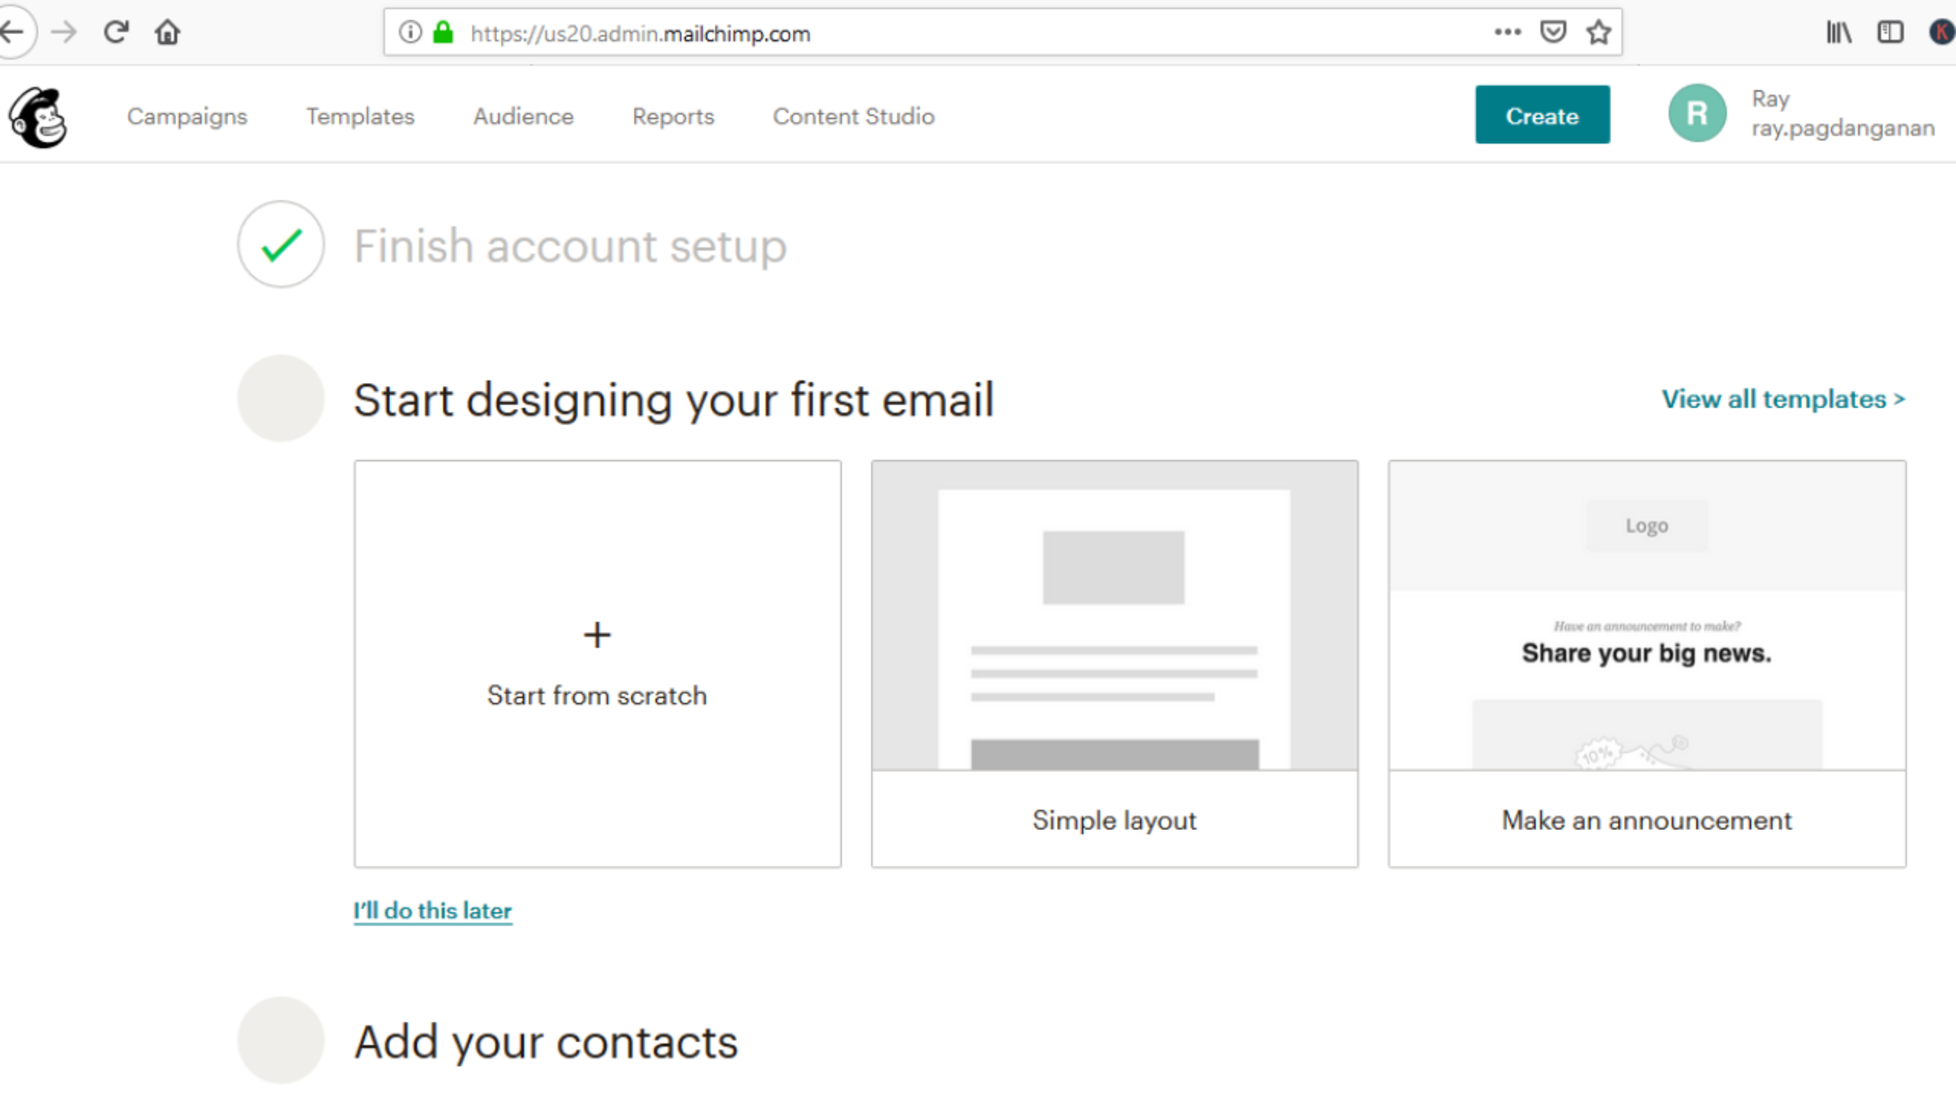
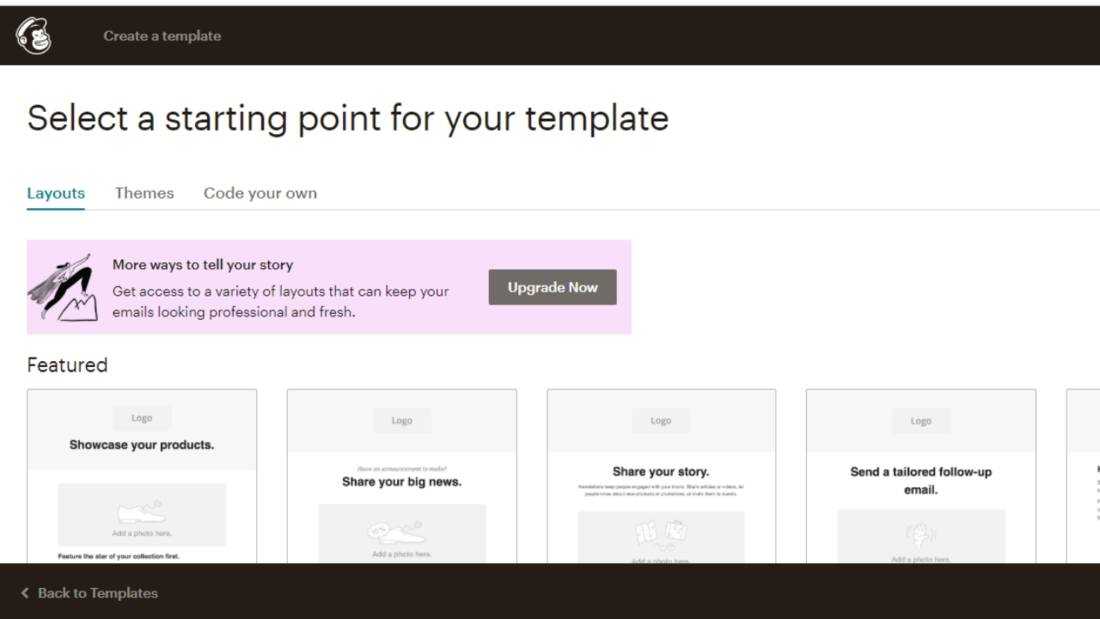
To set up a template, go back to the main dashboard, and click on the ‘Templates’ tab.
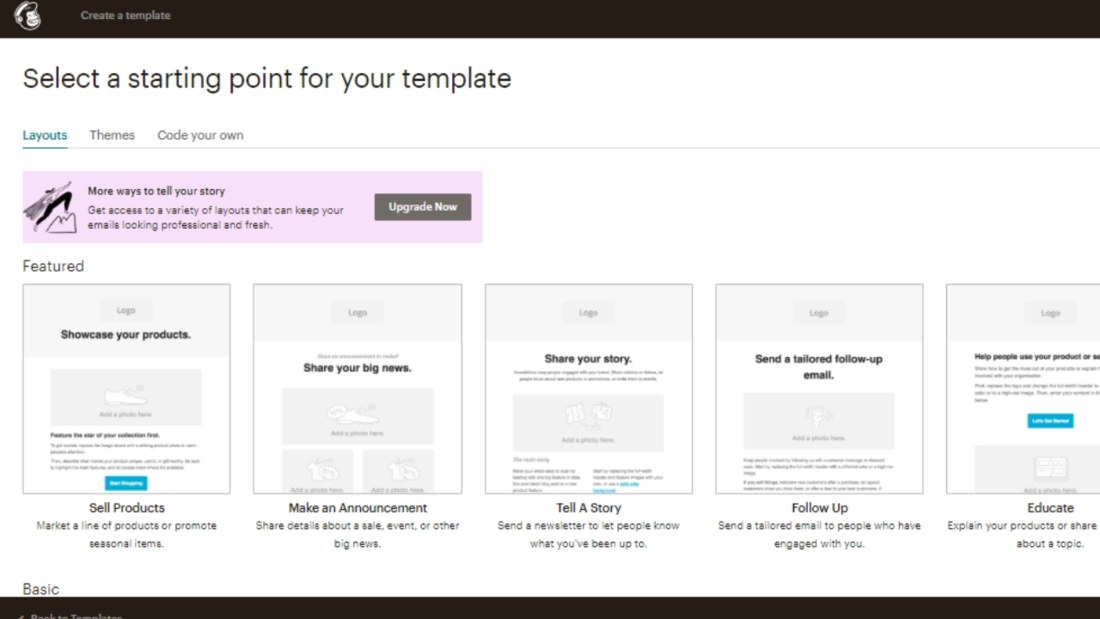
You’ll be thankful to see that Mailchimp already provides a list of preset templates as defaults. You can use these off the bat, or customize them for your own use.
Take a moment here to look through some of the templates. Mailchimp may have already provided a solution for your needs.
Some of the themes are suited to E-commerce, others for bloggers, so take a look at the different styles and designs to see if they’re going to be suitable for you.
You can check out some emails from other marketing campaigns from competitors in your sector and see if they’re similar to what you want to achieve.
However, you don’t need to use any of these templates unless you want to. You can create your own template entirely from scratch, and it’s pretty simple using Mailchimp’s built-in drag-and-drop tool.
Here, you can see several options to fully customize your email templates, such as adding images, video, and buttons.
After you’ve figured out the content you want in the email, go through the design tab and decide on the colors and fonts. Similar to how you may have done with your signup form, you may want the design to adhere to your corporate or personal brand.
That’s all you need to do to set up your first email template, and now you can move onto the campaign stage.
5. Setting up a campaign
Just as with the first things you’ve been setting up — the lists, the signup form, and the email templates — it is straightforward to set up your first campaign.
If you already have an email list in place, you could be sending out your first emails within minutes.
So let’s go back to the main dashboard, and this time click ‘Campaigns’, which is the first tab.
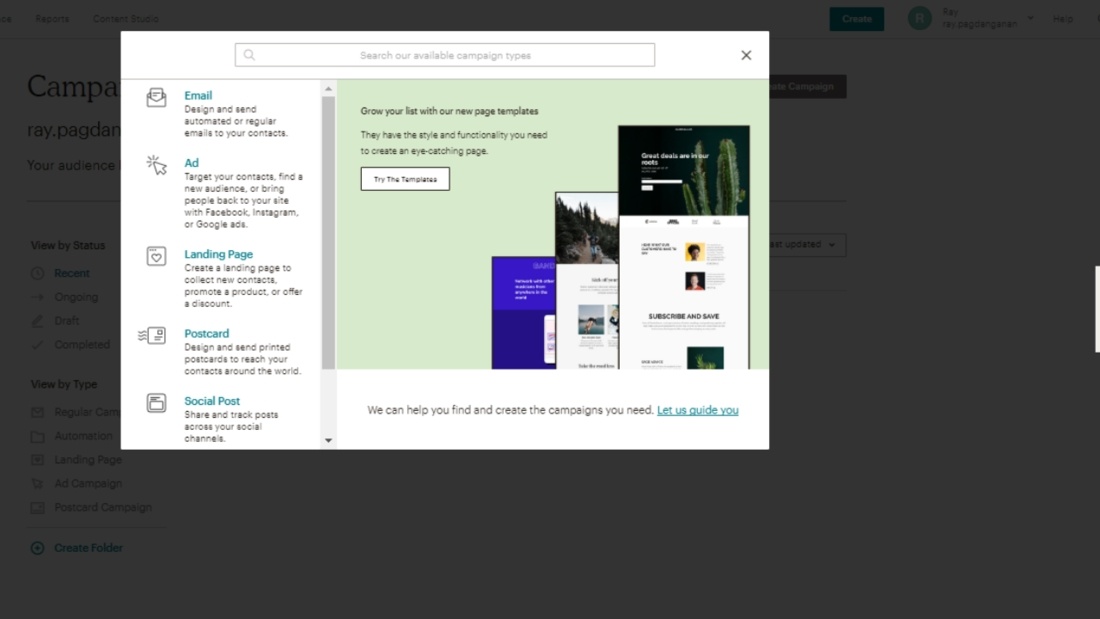
Click on the ‘Create Campaign’ button, and a new window will pop up. Enter the campaign name and campaign type. Note there are four types of campaigns on offer: Regular, Plain-text, A/B testing, and Automation.
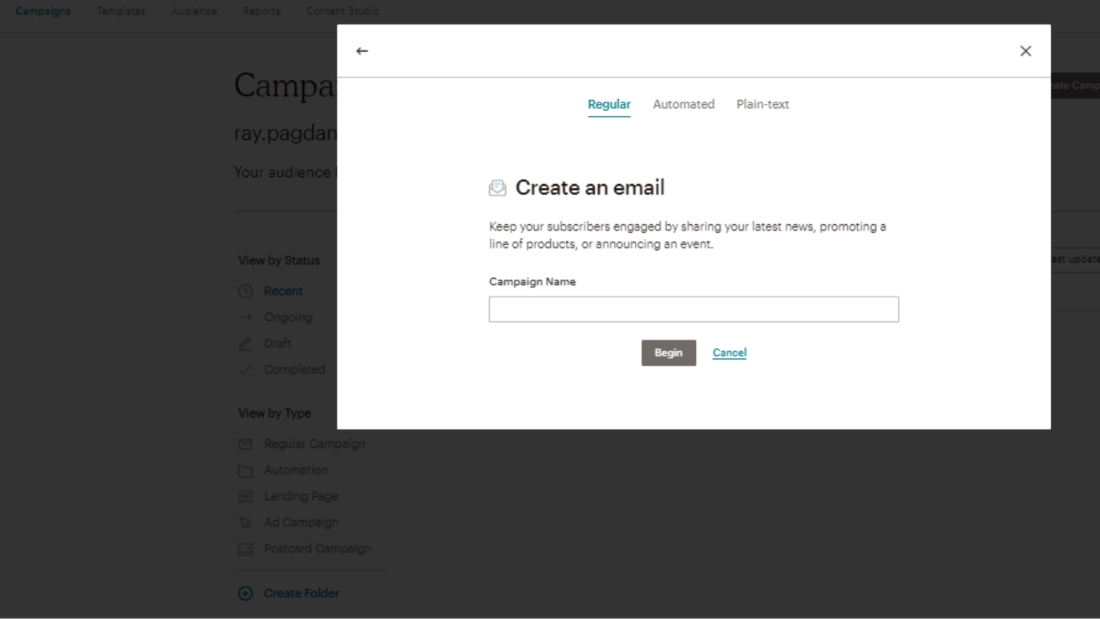
At this stage, let’s just focus on a Regular campaign, and we can come back to the others later. Go ahead and click the ‘Create’ button.
The next screen will come up, where you can choose the recipients of the campaign. For now, leave it on the option of ‘entire list’, and I’ll show you later how you can target only segments or groups.
A handy feature of this screen is a reminder as to how many people are subscribed to your list, which can help you decide whether you want to break the list down into segments or groups. But don’t do this yet.
On the next screen, you can enter the campaign info.
You should already have the From Name and From Email set up by default, but you can change it here if you like. The Campaign Name would have been brought forward from when you first created the campaign, so now all you really need to think about is Email Subject.
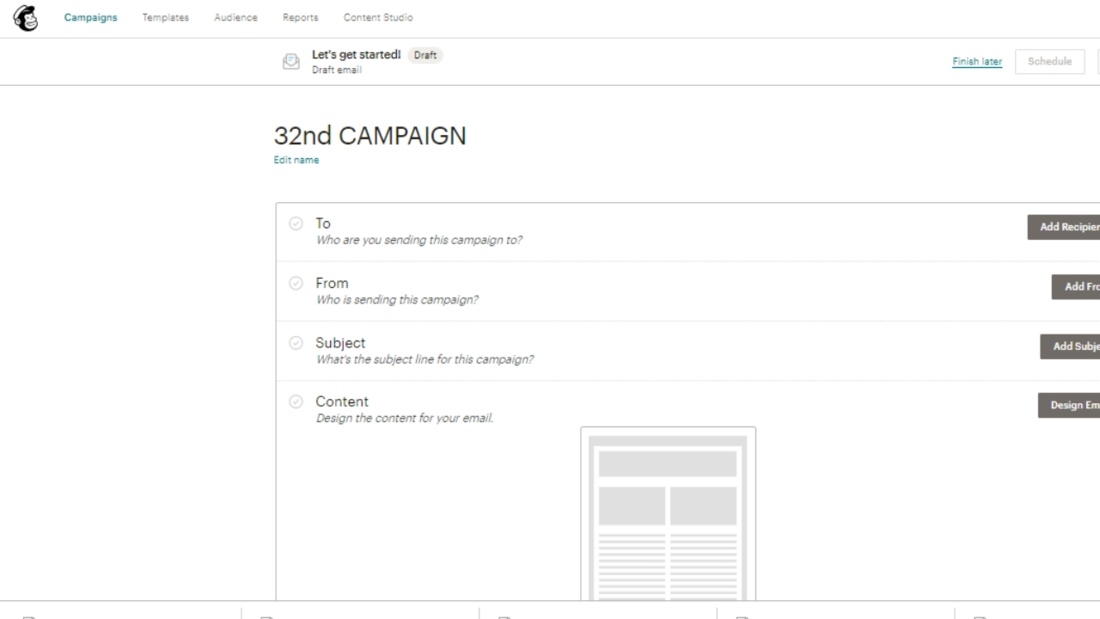
This will be where all your marketing skills come into play! Choose a Subject Line that really grabs attention and entices the recipient to open the email.
Your contact list should be filled with people who have chosen to subscribe, so they aren’t completely ‘cold’ leads, but you still want to grab your audience’s attention enough for them to go ahead and open the email.
[click_to_tweet tweet=”Your contact list should be filled with people who have chosen to subscribe.” quote=”Your contact list should be filled with people who have chosen to subscribe.”]Just because people have subscribed to your list, that doesn’t guarantee that they are going to be committed to opening any email you send them. Maybe they’re interested in the product or service you’re offering, but they need a little convincing to accept something new into their busy lives.
It’s going to be up to you to do all you can to get people on board, and the first thing beyond becoming subscribed to your list will be to get them to open the email, then read it.
If you’ve built up a healthy subscriber list, then you’re halfway there. You’re in the lead, but you haven’t won the race yet.
Mailchimp reports that the average open rate for emails is 20.81%, so that means you only have a 1 in 5 chance that the receiver of your email will open it, which means you should do all you can to make your Email Subject stand out.
Something else you should do to make sure your email gets read is to check the box that says ‘Personalise the “To” Field’. Type *|FNAME|* in the field and Mailchimp will automatically include the recipient’s first name in the ‘To’ field.
This is known as a ‘merge tag’, and Mailchimp gains this information from your lists, so make sure that the data in your lists is correct, and then the data in your emails will automatically turn out right (if you also use the correct merge tag).
There are two types of merge tags that Mailchimp uses: System tags and Audience tags. At this stage, you can focus on the Audience tags, to get your first campaign set up.
Audience tags are collected in the signup form that you’re using, which is then transferred to your lists. So, if there’s some information you really need when it comes to sending emails in your campaign, make sure you have your signup form set up correctly.
You may want to go back to step 3 of this guide before continuing. Think to yourself which information you’ll need from the recipient when it comes to sending out emails and be sure to ask for this information in your signup form.
Ok, so you got this far, and now it’s time for the real juicy bit of your campaign — actually sending it out!
But before you do that, you’ll want to preview your campaign. This is a really useful tool offered by Mailchimp to ensure you don’t send off 10,000 erroneous emails by mistake.
Thankfully, you can preview your campaign and view it as your contacts would see it, before you actually send it to them. You can see the email exactly as your recipients will see it.
Before moving on from this page, first, note that there are a couple of options regarding tracking and managing replies. Decide which is best for you and select the right options.
Getting the tracking and managing replies options right so that they work for you will really help you later when you begin managing all the responses. Get your choices right early on and it will save you a lot of time and headache!
6. Preview and Send your campaign
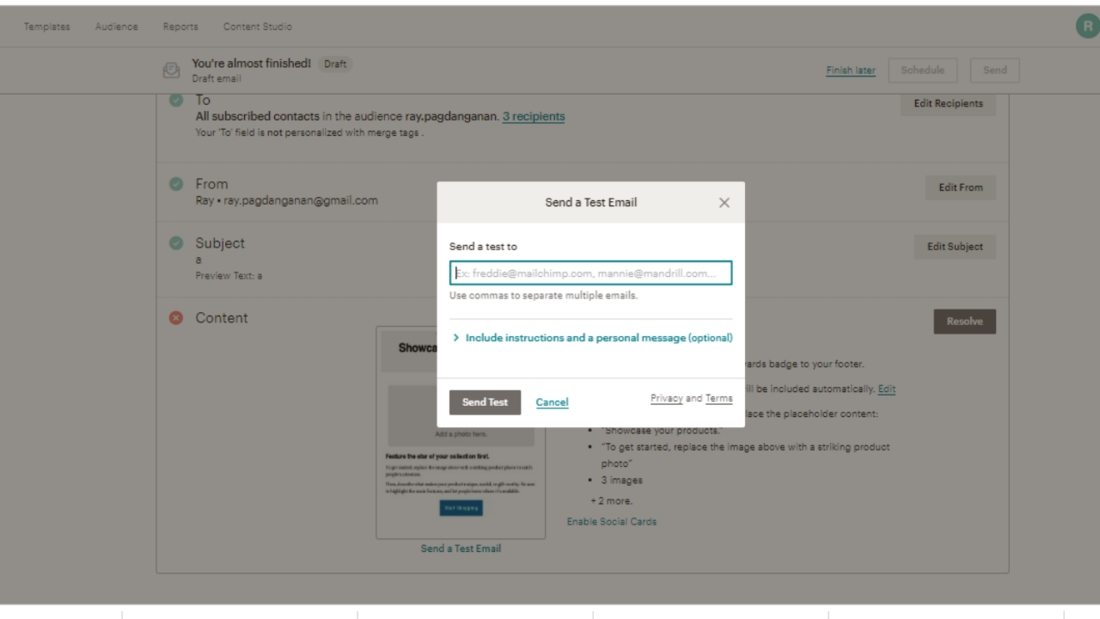
The best thing to do at this stage is to send yourself a test email to see how it appears to the end user.
You can try sending it to different email servers — Gmail, Yahoo, Hotmail. You could also view the email within email clients, or open the email up from your phone or tablet to see how it looks.
This way, you can iron out any problems before you send out an email with a mistake to several thousands of people in your subscriber list.
Check for formatting and design, to get a general feel for how the email looks and how it will appear to your audience, right from checking to see the Subject Line, to clicking through and drilling into the email.
You should also watch out for the specifics of your content — does the message make sense? Are there any spelling mistakes? How else can you improve your email?
You can also use the Preview feature right within Mailchimp. This will save time, however, I recommend sending the email to yourself on a few different email addresses and checking how it looks from different platforms such as your phone or tablet as I’ve described above.
That way, you’ll get a better idea of how the email will look, depending on how the email is received and viewed.
By using the preview feature in Mailchimp, you can also check how an individual subscriber will see your email if you are going to use merge tags.
Click on the filter that ‘Enable live merge tag info’ within the preview mode and this will show you how each individual subscriber will view your mail. If you are going to use merge tags, I highly recommend you check this out before moving on.
If you’ve done all the above correctly, it’s now time to actually send out your email… Are you ready?!
Once you are satisfied with all your previews, it’s time to take the next step and actually send out the email.
There will be no going back from this, so make sure you’re prepared. But don’t worry, if you’ve followed all the steps in this Mailchimp Ultimate Guide so far, you should be more than ready to progress!
You should always ensure you’ve previewed and tested the email before going ahead and sending it, which is why I’ve combined these two steps in the process.
So, go through the checklist one final time, and then hit the send button.
You can either send the email straight away or book it in for some time and date in the future. This is particularly important if you’re sending emails to clients in different time zones to the one where you’re working from.

What’s really useful is that Mailchimp recognizes the local time of the receiver, so that if you choose for the time to send the email to be 9 AM in London and 9 AM in New York, Mailchimp will make sure the email is sent to the user at their local time — that’s a pretty neat trick, huh?
You may also wish to think carefully about the best day to send an email. Several studies have concluded that sending a marketing email on Tuesday at 10 AM usually gets the best response rates.
So go ahead, send your email.
If you’ve got this far, it shows how committed you are to using Mailchimp to improve your business practices. But there’s more.
There are more features that are built into Mailchimp that can help you manage your business. In the next steps, I’m now going to show you how to use filters, split testing, and integrating Mailchimp with WordPress and other third-party platforms.
7. Using filters
Another neat trick that Mailchimp has up its sleeve is the ability to send an email to only certain target audiences within your lists.
[click_to_tweet tweet=”You can send an email to only certain target audiences within your lists in Mailchimp.” quote=”You can send an email to only certain target audiences within your lists in Mailchimp.”]To begin with, you’ll probably just want to send your emails to everyone in your list, but as your list grows, and you feel the need for more specialization or targeting certain groups, you’ll want to apply filters so that only certain people within your list receive your emails.
This is also known as segmentation.
Within your lists tab, click on the list, and then click on the button that says ‘create a segment’. Here, you’ll be able to choose from the users and then label your segments for later use.
There are two types of segments: Auto-updated, and Static.
The first kind will be updated by Mailchimp once a subscriber fits into the criteria. In this way, the segmentation is dynamic, as certain subscribers will drop into or out of the segment, depending on the data you’ve gathered about them.
The information you gather from the signup form (depending on how detailed it is, and how much detail you request) feeds into Mailchimp and the software then selects whether the subscriber should be a part of the list or not.
The other kind of segment is static, meaning that once you’ve chosen the person to be included in this segment, they will stay there unless otherwise chosen by you.
It would be a good idea to include as many subscribers as possible into the auto-updated style of segmentation. Otherwise, as your list grows and you’ll have less time to manage it, there may be some people that receive emails that are no longer relevant to them.
Do choose auto-updated segmentation when you can, as it will save you time and prevent aggravation from customers later. The last thing someone wants to receive is an email that has no relevance to them, so at this stage, you can allow Mailchimp to keep the segment updated automatically.
You can combine up to five different conditions that make the filters to create your segment, and then once you’ve clicked ‘preview’, Mailchimp will tell you how many subscribers fall into the segment.
If you are happy with the filters and the number of subscribers in the filters, you can go ahead and save your segment by clicking on the button on the top right.
Think of a good name for the segment that will help you remember who it’s aimed at, and then at this stage, you can also check the box that will allow Mailchimp to auto-update the segment.
You can always edit the filters yourself at a later stage if you’re not happy with the response rate. Which leads onto the next point: How do you know if your email campaigns are successful or not?
That’s a tough question to answer yourself. Conveniently, Mailchimp already has a way to track and report back on the progress of your campaign.
Yup, it seems that the guys at Mailchimp have thought of everything. Lucky for us!
8. Reporting the progress of your campaign (including A/B testing)
Mailchimp is a powerful tool for email marketing campaigns, no matter how big or small your business is.
One of the greatest features is the ability to check reports to see how successful your campaign is.
After all, you’ve gone through the trouble to set up your lists, send your emails and even fine tune it to send to only certain segments within the list, wouldn’t it be nice to see if your campaign is actually successful?
Fortunately, you can.
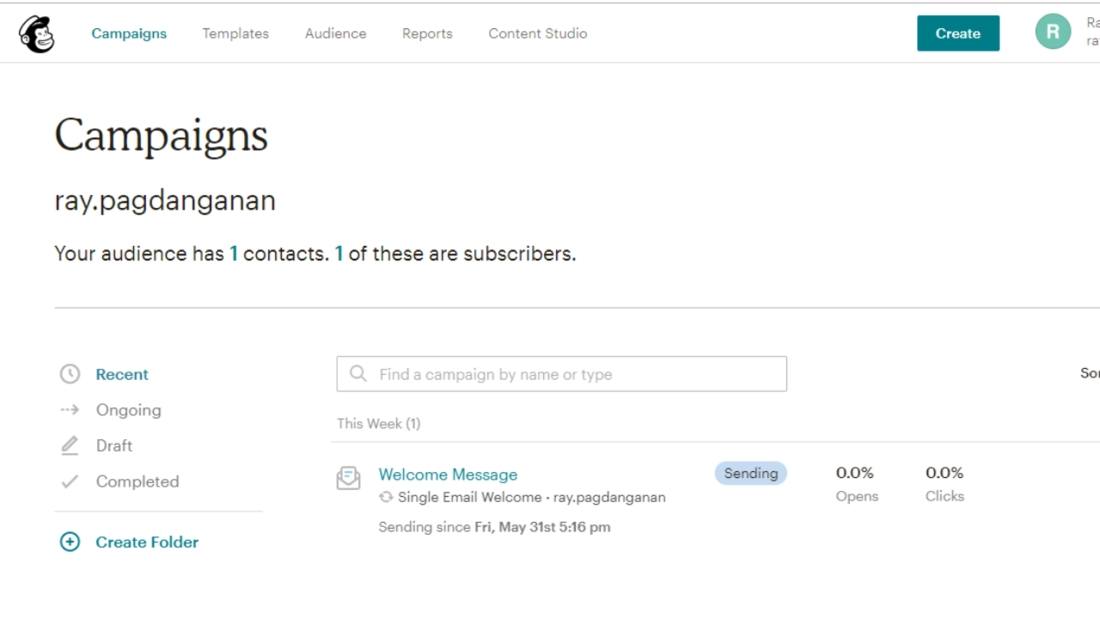
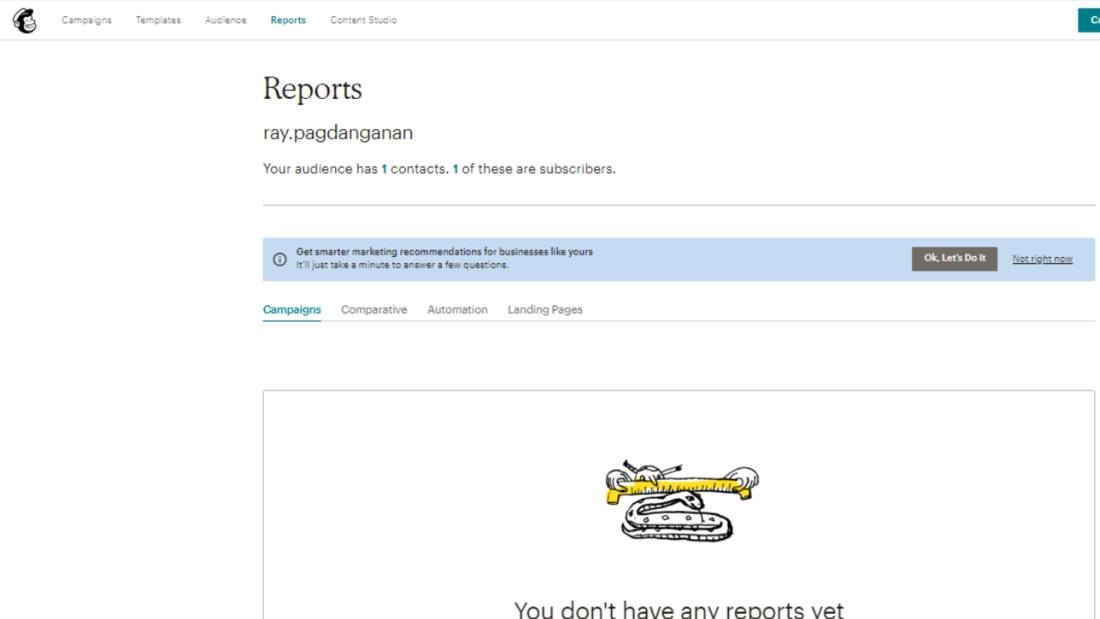
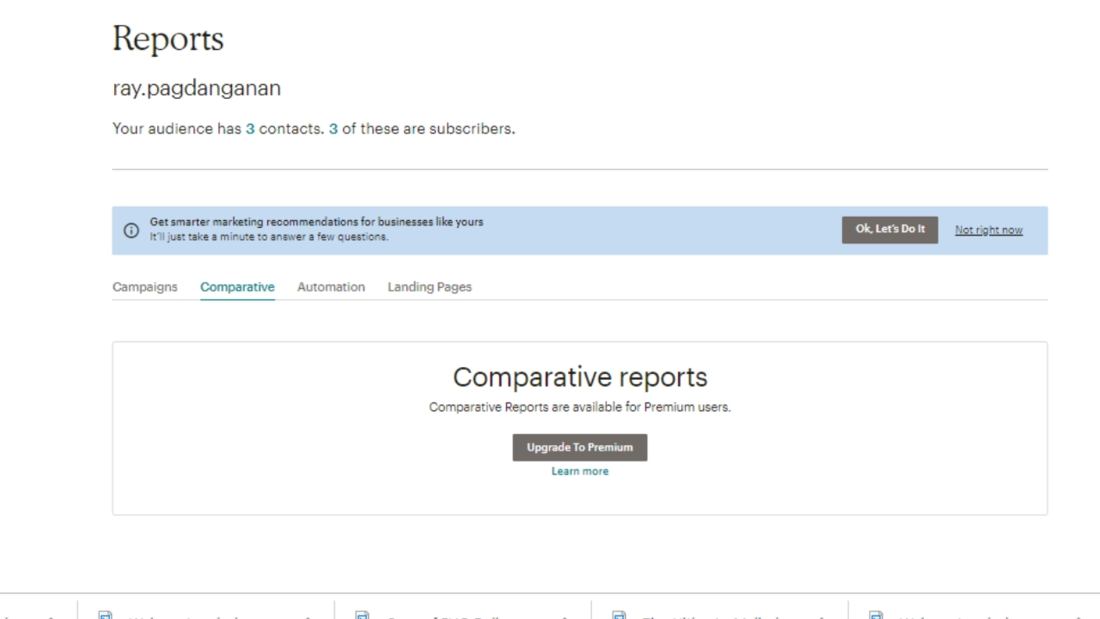
For this feature, you need to go back to the main dashboard and click on the ‘Reports’ tab.
Then, click on the campaign that you wish to see the report for. At this stage, you may only have one campaign set up. Click on it after the emails have been sent to your subscribers.
You’ll be given plenty of metrics here for you to review and analyze. Which ones you find useful will really be up to you and what you’re trying to achieve with the campaign.
However, I believe that all of this data is useful in some way or another, which is ultimately why the smart guys at Mailchimp are displaying it for you.
So, let’s have a quick breakdown of each one, and what it means:
Recipients

This shows the number of subscribers the campaign was sent to. If your campaign was sent to your entire list, then this will be the number. Or if you selected certain segments, this figure will remind you how many people the email was sent to.
Delivered
This displays the date and time the campaign was sent by Mailchimp. If you selected a certain time and date, then this should match that.
Open rate
This is a percentage of emails from your campaign that was registered as ‘open’ by Mailchimp. Remember that 1 in 5 average rate? If you are doing better than that, you must be doing something right in your campaign. If your open rate is lower, it is time to think about the possible reasons why.
Click rate
This displays a percentage of successfully delivered emails that registered a click, which is particularly useful for click-through campaigns.
List average for opens and clicks
This figure combines the percentage of opens or clicks on previous emails sent to this same list. This is for comparison.
Industry average for opens and clicks
Another useful tool for comparison is checking the average percentage of opens or clicks for campaigns in the selected industry set for your Mailchimp account. You want to reach more than the average; receiving fewer opens or clicks means you’re not doing something quite right in your campaigns.
Opened

This displays the number of recipients that opened the email on this campaign, any number of times.
Clicked
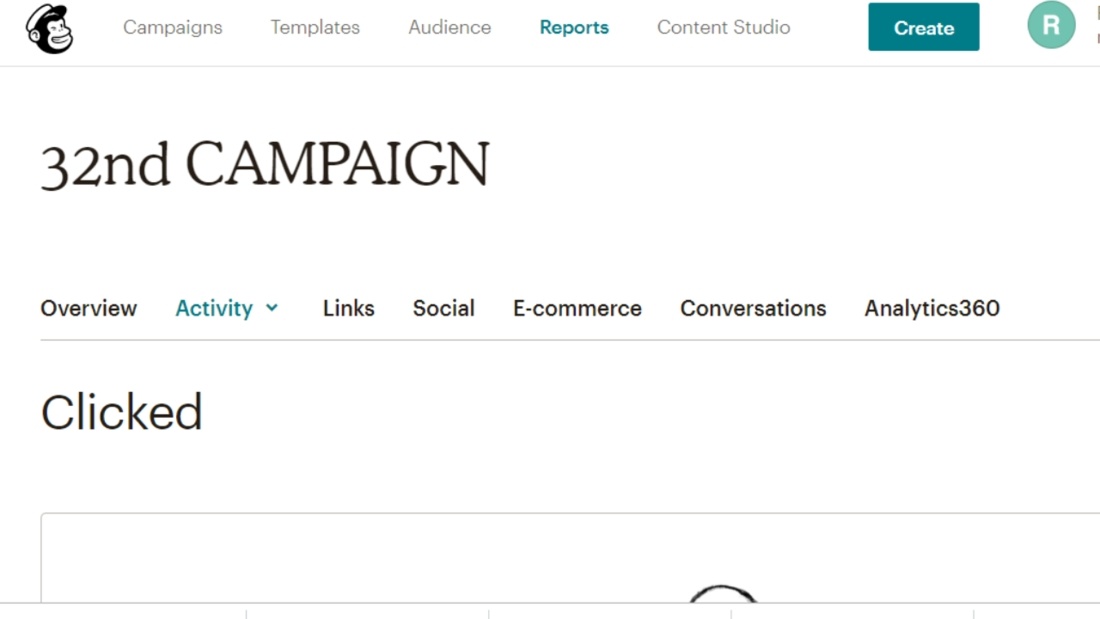
This is the number of recipients that clicked any tracked link any number of times in the email for this campaign.
Bounced
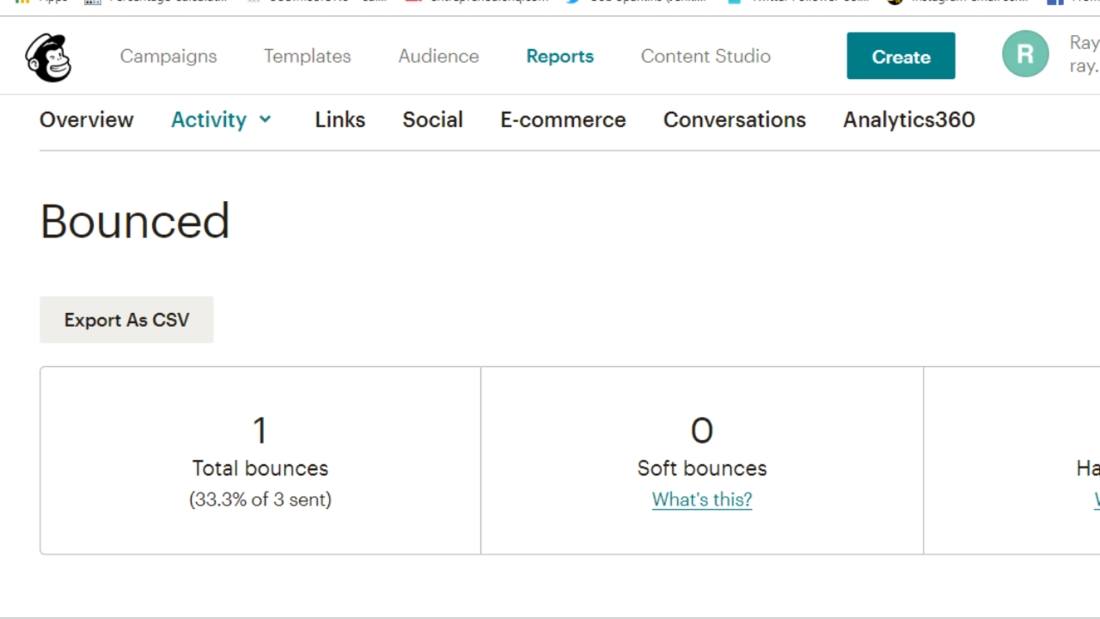
This displays the number of recipients that registered as a hard or soft bounce. Is it time to update your subscriber list so that it is current?
Unsubscribed
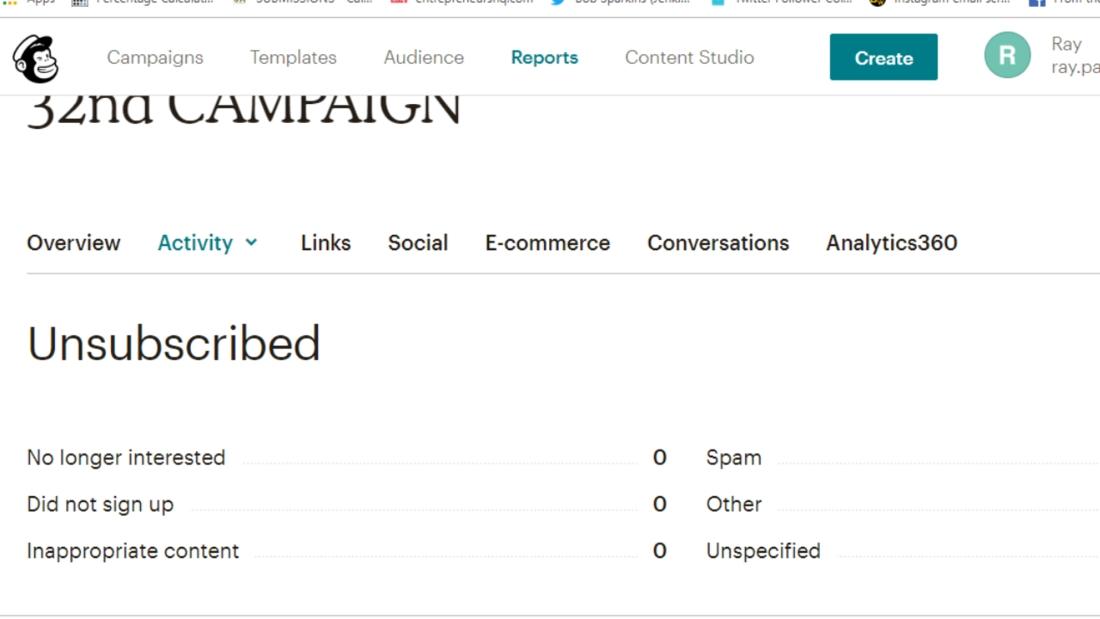
This shows you the number of recipients that actually chose to unsubscribe from your list by using the link you provided in the email. Hopefully, this will never be too many people each time, but if your numbers are dwindling, then it’s definitely time to go on a recruitment drive to get more subscribers and keep your list up to date.
Total opens
Similar to the ‘open rate’ metric, this shows you the total number of times that the campaign was opened by recipients, including multiple opens by individual recipients.
Successful deliveries

Opposite to the ‘Bounced’ metric, this shows you the number of recipients that didn’t hard or soft bounce on the campaign.
Clicks per unique opens
Besides the click rate, this shows you the percentage of recipients that opened the email, who also clicked a link in your campaign.
Total clicks
This shows the total number of times any tracked links within the email were clicked by recipients, including multiple clicks from individual recipients.
Forwarded
Are your emails doing the work for you? This metric shows the number of times the email was forwarded using the ‘Forward to a Friend’ form (be aware that this does not include any time a person forwards the email within their own email account).
Forward opens
Besides the above, I can also check the number of times that the forwarded email was opened by someone who had it sent to them using the ‘Forward to a Friend’ form.
Abuse reports
This displays the number of recipients that reported your email as spam (be aware that any subscriber that reports your email as spam is automatically unsubscribed from your list). Again, keep an eye on the number of people subscribed to your list, and always try to keep it current and relevant so that people are not receiving unwanted emails.
Last opened
This tells you the most recent instance of someone opening the email. If it has been a while since you sent the email and people have stopped opening it, then it may be time to start a new email campaign to try and get some more responses.
Last clicked
Similar to the above metric, this tells you the last time a recipient clicked a link within your email.
24-hour performance

This is a nifty graph displaying all subscriber activity for the first 24 hours after the campaign was sent.
Top links clicked
This shows you the most favored URLs from the campaign, i.e. the links that were clicked the most.
Subscribers with most opens
This is a handy metric that shows you the subscribers that opened the email the most amount of times. If a particular person responds well to a particular campaign, you may want to consider putting them into a segment to receive even more specialized emails that they will be encouraged to open.
Social performance
This is a rather nice tool to provide a view of how well your campaign is being received via different social media platforms. Be sure to have all the social media options set up properly before sending out your emails in order to receive feedback from this tool.
Top locations
A rather handy metric that shows you the geographic locations of where your emails are getting opened. Are your subscribers in New York more receptive to this particular campaign than those in Tokyo? Be sure to check the Top Locations for each email you send.
As you can see, there is plenty of data to analyze here. What you’re trying to find out is how successful your campaign is.
Naturally, if your campaign isn’t as successful as you’d hoped, then you’d be looking to tweak the email in some certain way to make it more appealing, receive better open and click-through rates, and so on.
But how will you know what works in an email?
There is a handy feature built right into Mailchimp already that can help you.
It’s called A/B testing; or otherwise known as split testing.
This is a tried and tested method that goes a long way to help you out by comparing an email side by side with another that has some different variables.
The email that has the greatest response rate depending on the variables is certainly the one you should be sending out to a wider audience, and you can discard the less popular versions.
To create a new A/B test for your campaign is simple. Go to campaigns, click the email, and then select ‘A/B test’.
Choose a name for your campaign and then select the list you’d like to email (at this stage you may still only be working from one list).
Now is the time to start selecting the variables. The things you can choose differently are the following: Subject line, From name, Content, and Send time.
Changing each of these variables, no matter how small the change may seem, may have a significantly different impact on the response rate.
For example, I already know from research that most people respond better to an email sent to them on 10 AM on a Tuesday, but that may change depending on your target audience. Maybe, for some reason, they will respond better on Wednesday or Thursday. It’s certainly worth testing.
Now with A/B testing, you can compare response rates from emails sent at different times, side by side.
Using A/B testing, you’re able to test one variable with up to three variations.
You can then use the A/B testing method again to check how different variables compare to each other.
After you’ve selected your variations, you’ll be asked what percentage of your recipients should receive the test combinations. You can use the slider to set the amount but note that if you’re testing the send time, you’ll only be allowed to apply this to 100% of your recipients.
Now that you’ve selected the number of people on your list to be tested, you can tell Mailchimp how it should decide which of the email options to keep.
The next window will ask you whether Mailchimp should select a ‘winner’ (i.e. the email to keep) based on open rate, click rate, total revenue or you can decide yourself and choose manually (if you have time to manage this).
Then, within the same window, you can also choose how long you want the test to run, i.e. the number of hours or days before the testing period automatically ceases and you’re fed back the results to either manually choose and send out the preferred email, or Mailchimp will automatically send out the email if this is the option you selected.
Now that you’ve selected the above, it’s time to enter the data into your variables. So, this will be either your different subject lines, from names, content, or send times.
A/B testing is just one of the powerful features that makes Mailchimp such a useful program for marketing email campaigns. If you’re new to split testing, you’ll certainly begin to see how much this tool can help you.
It may take some getting used to, but trust us, A/B testing is one of the best tools to help you fine-tune your emails so that they receive maximum response rate. It takes a lot of the guesswork out of the process.
But there’s more. The magic of Mailchimp doesn’t stop there. You can level up by linking it to third-party applications, including integrations with the mighty WordPress.
9. Mailchimp and WordPress
For long-term users of WordPress, many have known the potential of combining it with the Mailchimp experience.
So much so, that WordPress has even created a Mailchimp plugin that you can download and use on your site.
This certainly speeds up the process of allowing visitors to join your mailing list if you have a WordPress site.
However, you needn’t use the plugin unless you want to, as it is possible to integrate Mailchimp into your site without the plugin.
If you prefer to go this route, your options for doing so are to either copy the URL for the Mailchimp signup form and insert it as a link into your WordPress site, insert an embedded form, or a popup form, using some code.
However, there is little reason to not use the plugin that WordPress has kindly designed just for Mailchimp users, so my best advice is to go ahead and install it.
Once you’ve installed the plugin, you need to head over to the Mailchimp settings option within WordPress. Then, you can connect your Mailchimp account, using an API key.
You can find your API key by clicking on the option directly below the box that asks you to enter the key. By clicking on this, you’ll be directed to the Mailchimp website, where you can click on ‘create a key’. Copy this code and enter it into the API key box on WordPress.
Your Mailchimp account should now be linked to your WordPress site.
Now that you’ve linked both accounts, it should be straightforward to insert Mailchimp’s Embedded Form or insert its Subscriber Popup Form onto your WordPress site.
If you run a WordPress site and are looking to increase your subscriber list, then integrating it with Mailchimp should be a great way to do some serious list building.
There’s also some other neat integrations you can check out.
10. Power up your Mailchimp experience with integrations
As well as WordPress, there are several other integrations you can try to help build your subscriber list.
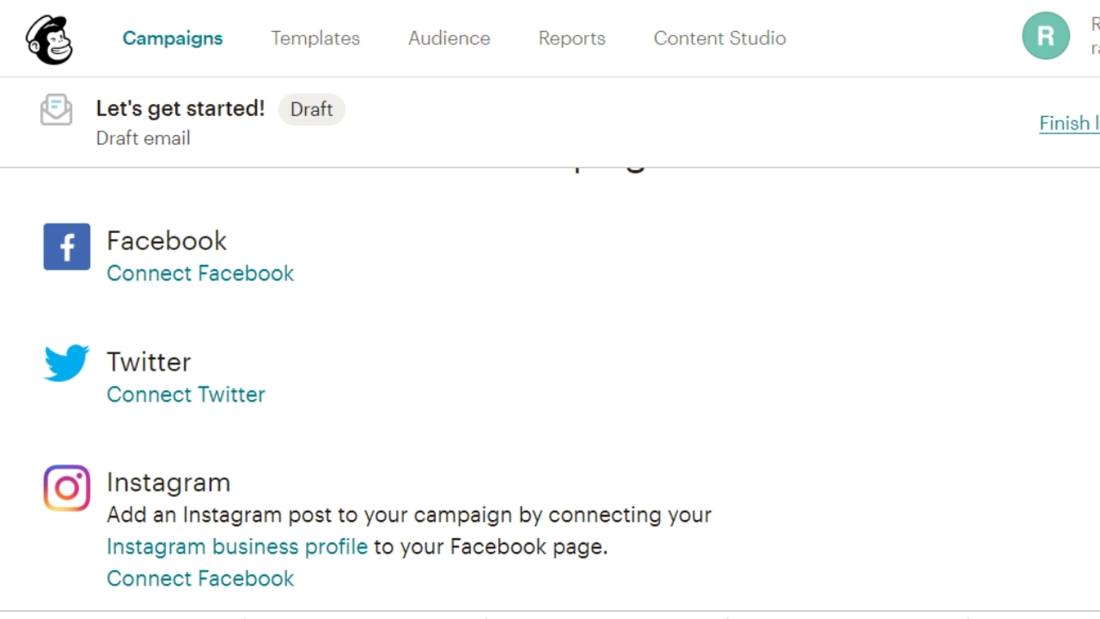
I’ll start with Social Media, and there is no doubt that Facebook has a wide appeal.
Mailchimp allows you to embed a signup form on your Facebook page. Aside from that, you can easily post a link to your Mailchimp landing page anytime you feel like it.
You can also post a link to your landing page or a signup form on your Twitter feed.
If you’re using a site such as Shopify, you can use a third-party integration such as ShopSync to integrate your account with Mailchimp.
Automate.io and Zapier also offer an easy way to link your Shopify account with Mailchimp, as well as using these applications to link to several other e-commerce sites and web services.
You’ll be pleased to know that Mailchimp currently offers integrations with several other third-party applications that should improve your experience and help you grow your subscriber list
So, whether you’re a blogger, store manager, or any other kind of web-based business owner that relies on email subscriptions to create marketing campaigns, you can get Mailchimp to effectively work for you.
You can check the current integrations on the Mailchimp website, as well as the instructions on how to link them together. At my last count, there were 202 integrations available.
In my opinion, Mailchimp is one of the best email marketing campaign programs you’ll ever use.
As your business grows in size, you may be tempted by other software that can fully automate campaigns, but as far as I see it, Mailchimp does enough to save you time whilst allowing you to have full control of your campaigns.
It may require some concentration to get to grips with Mailchimp if you’ve never used it before, but don’t be afraid to play around with all of the options to unleash the full power of the app.
I’m sure you’ll benefit from Mailchimp as you start to build your subscriber lists and begin to launch your campaigns.
With this 10-step user guide, it should be enough to get you started on Mailchimp. I’ve covered all the basics to give you a firm footing, but the rest will be up to you.
So come on, let’s get going and start building your lists today!